Step-by-Step Instructions for Tesla Charger Installation
Have you ever wondered what it takes to install a Tesla Wall Charger at home? Are you eager to enjoy faster charging and more convenient vehicle management? If this sounds like you, then you’ve come to the right place. Today, we’re going to walk you through everything you need to know about Tesla charger installation: from the initial planning and permits in Australia to the final checks that ensure your charging station runs beautifully.
In this blog post, you’ll discover why installing a Tesla Level 2 charger is a game-changer for anyone who owns a Tesla. You’ll also learn about the different Tesla charging options and find out how a Tesla charger installation PDF can be your best friend during the process. By the end, you’ll have a clear picture of the tools, steps, and considerations needed to make your Tesla charging dreams a reality.
We’ll dive into the specifics of hiring an electrician versus doing it yourself, look at potential troubleshooting tips, and even discuss the best spots to install your charger. So, if you’re curious about installing a Tesla charger in your garage or outdoors, stick around. We’ve got a thorough guide that’s sure to simplify every step for you.
Why Installing a Tesla Wall Charger at Home Is Worth It
Getting a Tesla is an exciting step, but many owners soon realise how important it is to install a dedicated charger at home. Charging your car overnight can give you a full battery by the next morning, which means no more detours to public charging stations. Plus, a home-friendly Tesla Level 2 charger is faster than a standard socket, allowing you to get back on the road as quickly as possible.
Imagine the convenience of waking up to a fully charged Tesla every day. There’s no need to stress about fluctuating public charger queues or the time it takes to top up at a slower outlet. By installing a Tesla Wall Charger at home, you’re investing in long-term convenience and a more seamless experience overall.
In addition, the cost savings can be impressive. While you’ll have to pay for electricity, you often end up spending less compared to regular petrol costs. This becomes particularly evident over years of Tesla ownership when you compare your reduced running costs to those who rely on fossil fuels. For many, it’s a compelling reason to get stuck into installing a Tesla wall connector right away.
Key Benefits of a Tesla Level 2 Charger in Australia
When it comes to Tesla charging, Australians have a sweet spot in the form of the Tesla Level 2 charger. This charger delivers a higher electricity supply than a regular socket can handle, giving you quicker charging times. If you use a basic mobile connector that plugs into a standard power point, charging can be quite slow. A Level 2 solution, on the other hand, gives you the power you need without the usual waiting around.
Beyond just speed, a Tesla Wall Charger designed for Australian homes is built to handle the local electrical standards. This is crucial for safety and ensures your installation meets the requirements of Australian authorities. In many cases, the manufacturer’s guidelines—found in a Tesla charger installation PDF—clearly outline the recommended electrical specs and setup.
Finally, having a Tesla Wall Charger at home can even add value to your property. As electric vehicle adoption grows in Australia, buyers are starting to see built-in charging facilities as highly desirable features. It provides an added layer of convenience, which can be a bonus when it’s time to sell. In short, installing a Tesla charger in your garage is not only practical but can be a smart long-term investment too.
Planning Your Installation
Before you rush out and drill holes in your wall, it’s wise to think carefully about your Tesla charger installation. Planning ensures you don’t run into surprises down the track. Besides, a little prep work can make the whole process smoother and quicker.
Where Should I Install My Tesla Charger? (Garage, Carport, or Outdoors)
Most Tesla owners prefer to install their chargers inside their garage, as it keeps the vehicle safe from the elements. Installing a Tesla charger in a garage also allows you to lock up and protect the charger from accidental damage or vandalism. However, if you don’t have a garage or it’s not convenient, you can opt for a carport or an outdoor location.
When installing Tesla charging in a garage, location plays a big role in day-to-day convenience. Ideally, you want the cable or charging port to be easily accessed. Check how you prefer to park your car and place the Wall Connector accordingly. If you plan to install outside, ensure the Tesla Wall Connector is weather-rated for Australian conditions and well-protected from direct rain exposure.
Do I Need Council Approval or Permits in Australia?
Permit requirements vary by local council, so call or check your council’s website to find out if you need approval. In many cases, installing a Tesla charger at home doesn’t necessarily require a separate permit beyond standard electrical compliance. However, if you’re constructing a new structure or doing significant electrical upgrades, it’s best to consult with an electrician and verify local regulations.
If you’re unsure, it’s safer to ask rather than face penalties. This is especially relevant if your planned installation involves new conduits or a large electrical panel upgrade. Some councils may have specific guidelines to follow, such as safe distances from property boundaries or limitations on external equipment. Doing a bit of research ahead of time can save you headaches later.
Is a DIY Tesla Charger Install Possible?
A DIY Tesla charger install can be done if you have electrical knowledge and are confident working with high-voltage systems. However, the risks are significant. An incorrect installation could not only void your Tesla Wall Connector’s warranty but also pose serious safety hazards. Plus, Australian regulations often require a licensed electrician for certain tasks.
If you’re an experienced home DIY enthusiast who knows the ins and outs of electrical wiring, you might give it a go—so long as you’re complying with local rules. But remember that a certified electrician can help ensure a safe and code-compliant job. It’s also worth noting that if something goes wrong, having a professional’s sign-off can be beneficial when dealing with insurance claims.
Tools and Materials
Before starting the installation, it’s helpful to gather all the equipment and resources you’ll need. This not only streamlines the process, but it also prevents surprises midway through.
Essential Equipment for Installing a Tesla Wall Connector
Your main piece of kit is, of course, the Tesla Wall Connector itself. You’ll also need a drill, screwdrivers, a level, wire strippers, and cable ties. If you’re planning a more advanced DIY job, you may require a circuit breaker specific to the amperage Tesla recommends.
Proper safety gear is a must. Wear protective gloves, safety glasses, and make sure you have non-conductive footwear. If you’re unsure about any piece of equipment, consult the Tesla charger installation instructions or ask a local professional for clarification. The last thing you want is to discover halfway through the job that you’re missing something crucial.
Reviewing the Tesla Wall Connector Manual and Wall Connector Installation Guide
Before you pick up a single tool, spend time reading the Tesla Wall Connector manual. This manual covers the entire installation journey, providing details on cable entry points, recommended mounting heights, and the correct torque settings for electrical connections. It’s basically your best friend for a smooth install.
The official wall connector installation guide offers step-by-step instructions for the mechanical and electrical aspects. It outlines safety tips, common pitfalls, and final testing procedures. Likewise, any Tesla charger installation PDF specifically targeted at Australian installations will be especially handy, as it often includes Australia-specific electrical standards and advice.
Preparing Your Space for a Home Charger Setup
A bit of prep work makes all the difference. Clear away any clutter where you plan to install the charger, be it the garage wall, carport, or an outdoor post. Ensure the space is well-lit and that you have enough room to work comfortably. You might need to move storage boxes, kids’ bikes, or other objects to achieve a safe workspace.
If you plan to route the cable along a wall or across the ceiling, map out the path before drilling. Identify where the wire will enter your main electrical panel. This planning step helps you pinpoint the best route to avoid structural beams or ductwork. Having a neat, well-thought-out layout also makes future maintenance much more straightforward.
Step-by-Step Tesla Wall Charger Installation Guide
Now that you’re prepared, let’s walk through the essential steps to install your Tesla Wall Charger. Keep in mind that safety should be your top priority. If you feel in any way uncertain, get in touch with a professional.

Step 1: Choosing and Marking the Mounting Location
Start by deciding the charger’s position on the wall. Think about cable length, convenience when parking, and potential obstructions. The Tesla charger installation guide notes recommended mounting heights, so consult that to verify your wall’s suitability.
Once you’re set on a spot, grab a pencil and level to mark the holes for the mounting bracket. Double-check your measurements and confirm the bracket aligns properly with any studs or support structures behind the wall. A stable mount is crucial, especially if the charger or cable experiences accidental tugs.
Finally, take a moment to picture how the car will sit and how far the charging cable will stretch. Ensuring everything lines up well will save you from awkward cable angles later on.
Step 2: Turning Off Power and Setting Up Wiring
Before you do anything related to electrical wiring, switch off the main power at your home’s electrical panel. This step is not negotiable—electric current can be deadly if you work on an active circuit. For extra caution, tag the breaker box with a note warning others not to turn the mains back on.
Next, run the cable from the breaker box to where your Tesla Wall Connector will be installed. Depending on your home’s layout, you might route the conduit through your garage wall or under the floorboards. The Tesla charging installation guide usually specifies the recommended gauge of wiring, so follow that closely.
Once the wire is where it needs to go, strip the insulation carefully. Then, get the circuit breaker installed in the right spot, matching Tesla’s amp recommendations. If you aren’t sure, consult a Tesla wall charger installation electrician who can do the wiring to code.
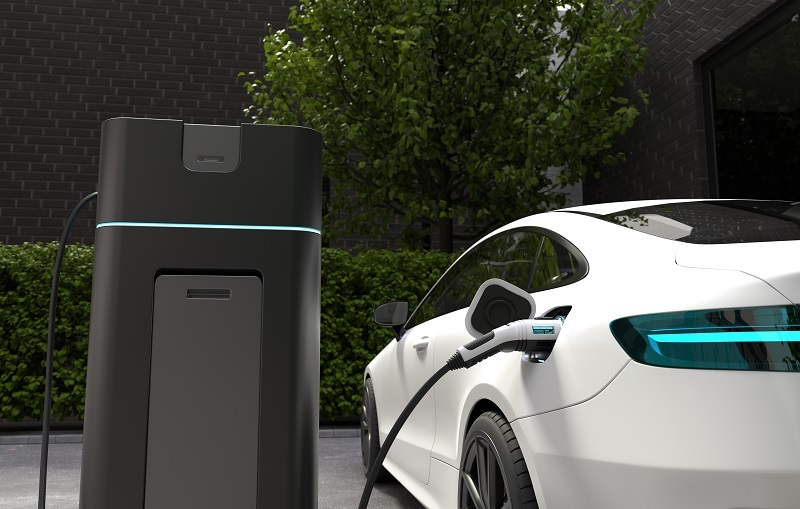
Step 3: Mounting the Tesla Wall Connector
Now it’s time to attach the mounting bracket. Drill pilot holes into the marks you made earlier, and then secure the bracket using the screws provided with the Tesla Wall Connector or those recommended in the instructions. Make sure the bracket is firmly anchored—any wobble could lead to issues in the future.
Next, pop the Tesla Wall Connector onto the bracket. Depending on your unit, you might have to remove a small cover to feed the wires in. Double-check that the device sits flush against the wall and that any cable glands are sealed properly to prevent moisture from getting inside.
If you’re working in an outdoor setup, you might also need to apply weatherproofing materials. In that case, follow the Tesla wall charger installation manual for guidance on sealing the charger’s openings and mounting hardware. This helps keep your charger safe from Australia’s varied weather conditions.
Step 4: Connecting the Wall Connector to Power
Remove the front cover of the Tesla Wall Connector to access the wiring terminals. You’ll typically see separate terminals for active, neutral, and earth. Refer to the Tesla charger installation instructions for colour-coding details, usually following standard Australian electrical conventions.
Carefully insert each wire into its corresponding terminal, ensuring a snug fit. Tighten the terminal screws to the torque setting recommended in your Tesla wall connector manual. Do a visual check to confirm no wire strands are sticking out. Also, confirm the earth wire has a solid connection, as grounding is essential for safety.
Once done, you can attach any panel covers or protective plates. Just make sure everything lines up properly before you switch the power back on.
Step 5: Final Checks and Testing
After reconnecting the power at your home’s electrical panel, it’s time to test. Plug your Tesla into the newly installed charger, checking to see that the charging indicator lights up. Listen for any unusual sounds like buzzing or crackling. If you notice anything off, switch off the breaker and investigate or call a professional.
Once your vehicle starts charging normally, monitor it for a few minutes to ensure everything works smoothly. Look for stable charging speeds and check the charger’s display lights if applicable. A good sign is your Tesla’s screen showing a healthy voltage and amperage. If everything seems good, congrats—you’ve completed your Tesla Wall Charger installation at home.
Conclusion
Installing a Tesla Wall Charger at home is a fantastic way to streamline your EV experience. You’ll enjoy faster charging, added convenience, and potentially even boost your property’s value. While the installation may seem daunting at first, breaking it down into simple steps helps you navigate the process with confidence.
Whether you choose to tackle a DIY Tesla charger install or hire a Tesla wall charger installation electrician, thorough planning is critical. Think carefully about where to place your charger, consult with local councils as needed, and pay close attention to your home’s electrical capacity. Seeking out guidance—whether from the Tesla charger installation PDF, the Tesla wall connector manual, or industry experts—can save you time and money in the long run.
Ultimately, having a strong home charging setup means you can hop into your Tesla every morning with a completely charged battery. This convenience is tough to beat and turns your vehicle into a truly hassle-free mode of transport. We hope this guide helps you feel more prepared to tackle your Tesla charger installation, so you can get the most out of your electric driving journey.